How can I create project "folders" to organize my SmartCoding instance?
Projects Feature
Projects should be used as a way to organize SmartCoding instances visually on the directory. Each SmartCoding instance should only be assigned to one project. The simplest way to think of this feature is to think of the interaction that Folders have on mac and windows file organization.
Scenario 1: Creating "Project" when uploading different data sets for the same project
When creating a new SmartCoding instance you will see a "Project" field that allows users to label each SmartCoding instance to the same project.
For example, you will upload 3 different SmartCoding instance : Open End Q1, Open End Q2 and Open End Q3 and these 3 are under the same Project name (i.e. Project Intel)
1. When uploading the data set for Open End Q1, type in or add "Project Intel" in the Project field
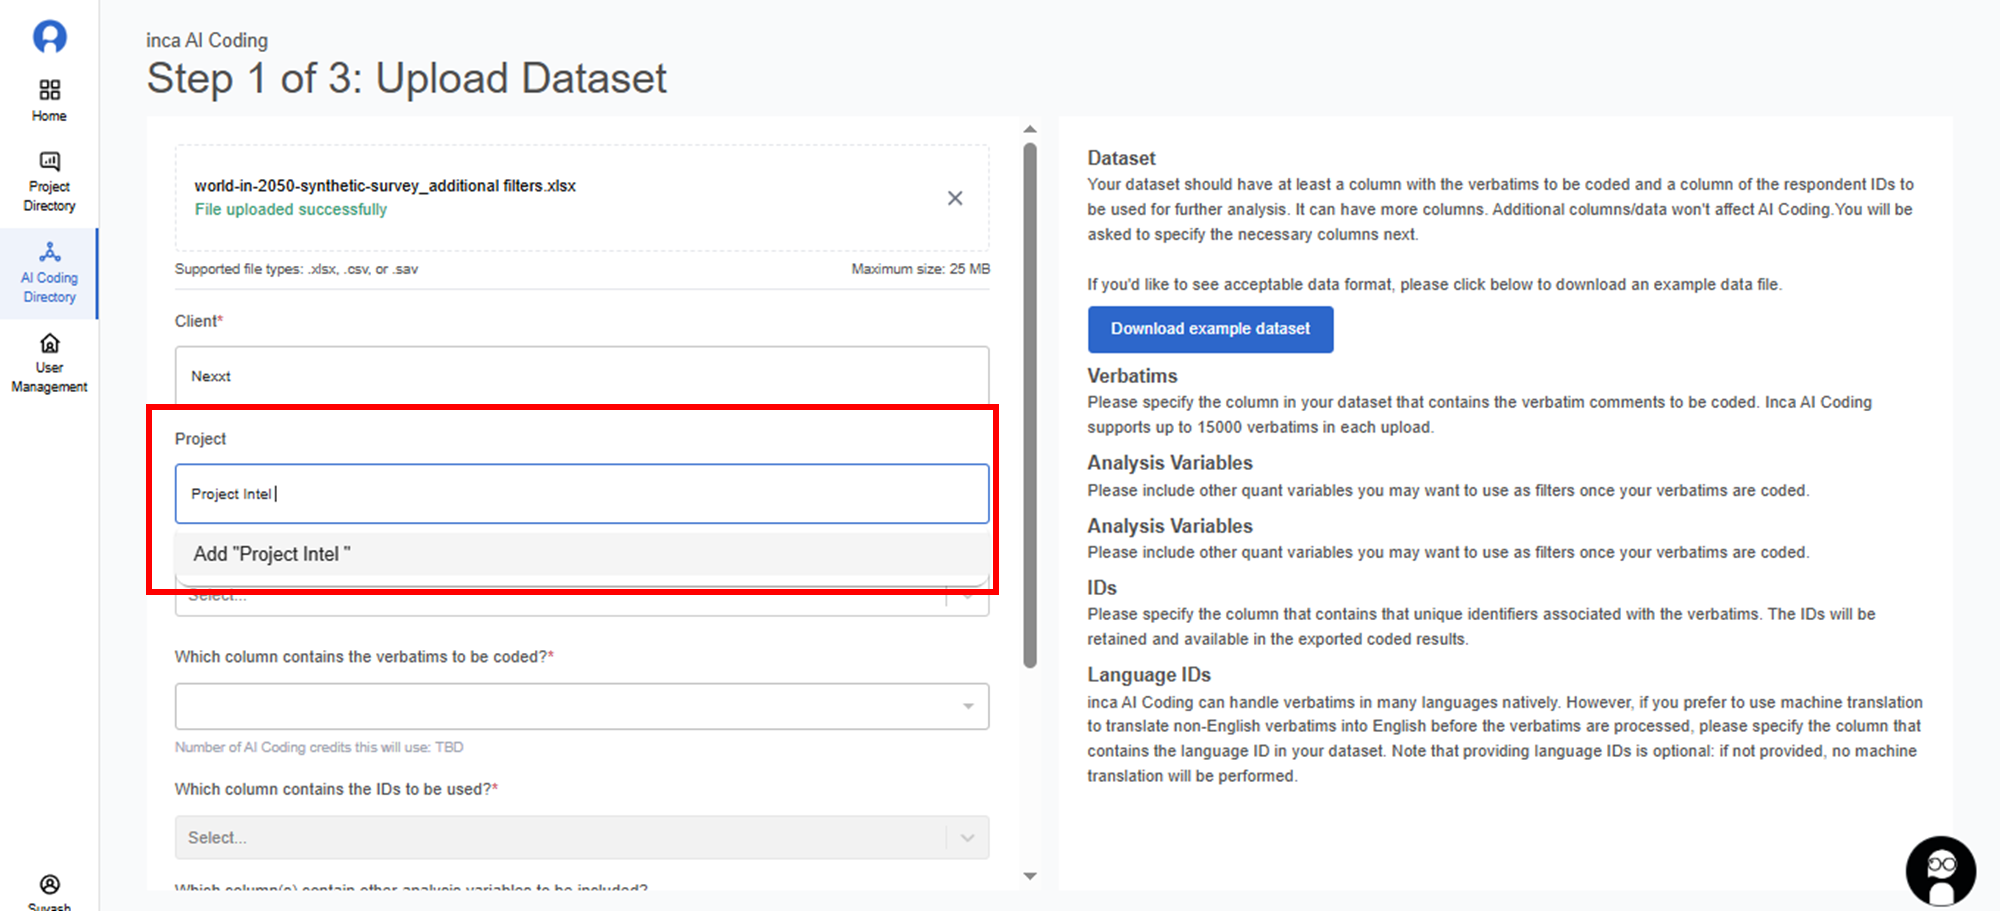
For example, you will upload 3 different SmartCoding instance : Open End Q1, Open End Q2 and Open End Q3 and these 3 are under the same Project name (i.e. Project Intel)
1. When uploading the data set for Open End Q1, type in or add "Project Intel" in the Project field
2. Then click Add, to approve the Group name or the Project name
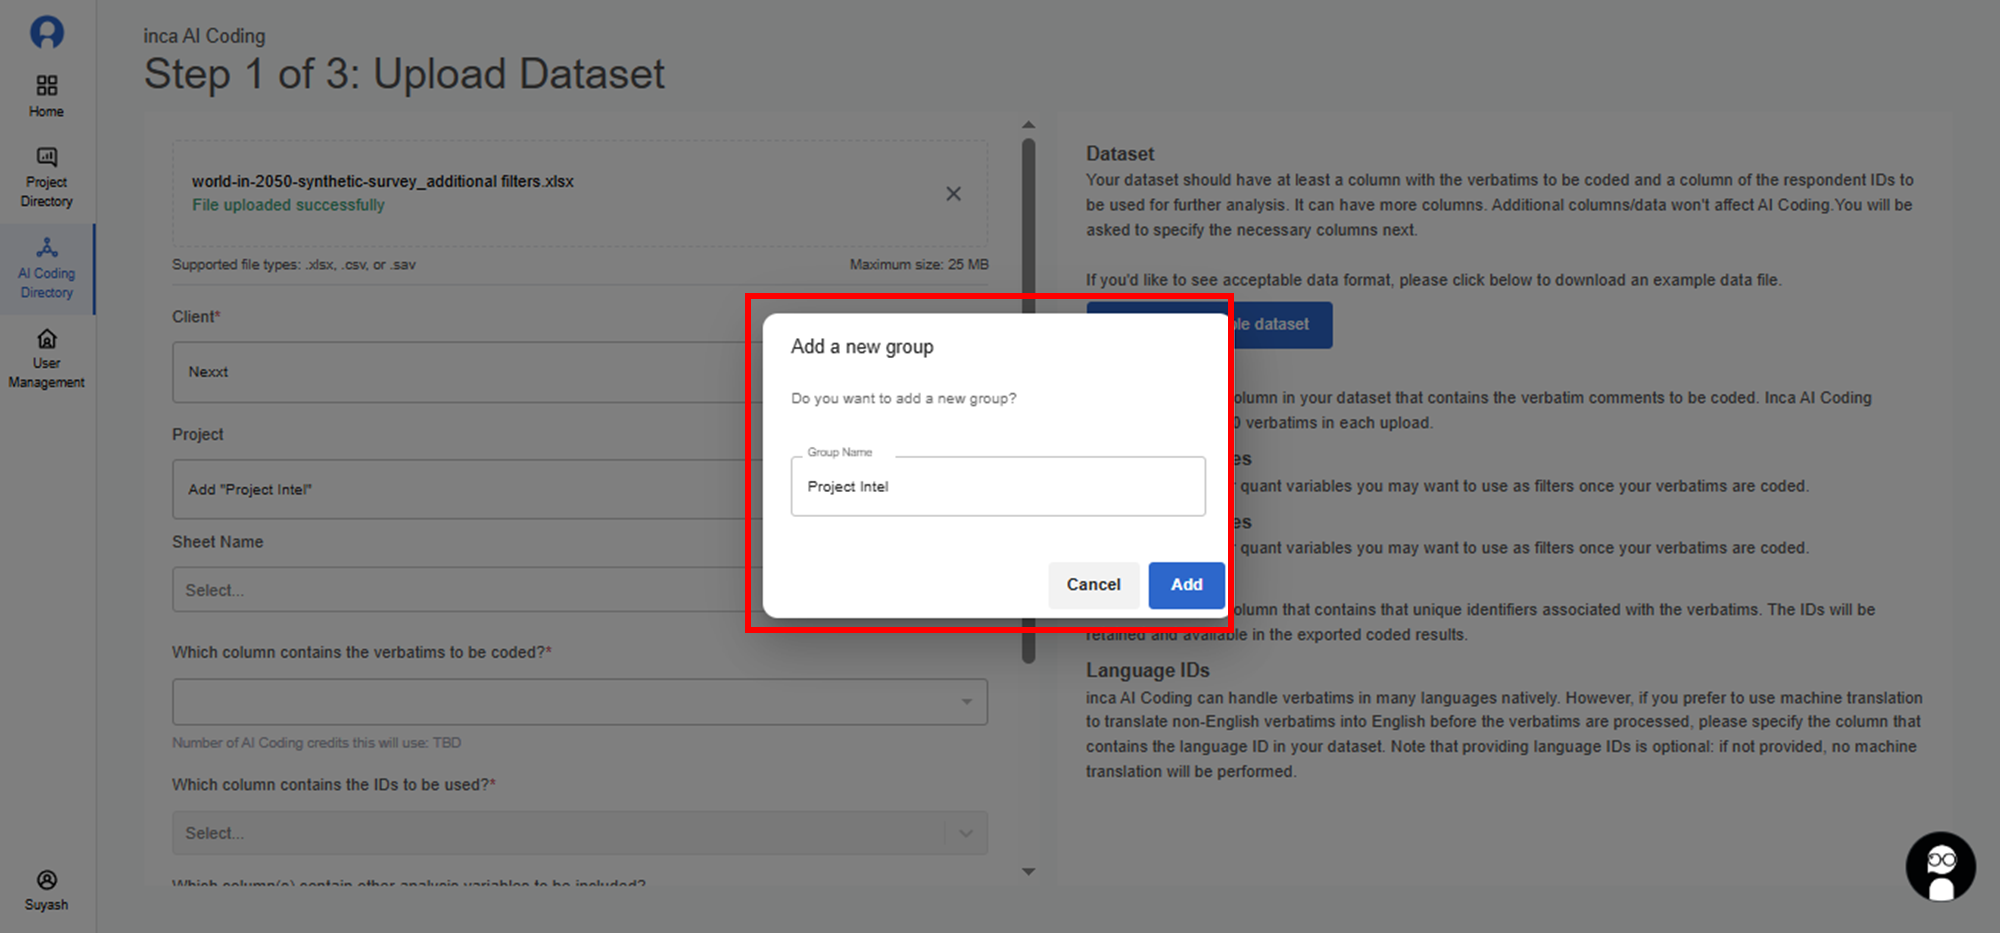
3. And when uploading data sets Open End Q2 and Open End Q3, you can now select the same project name in the drop down list
Scenario 2: Organizing "Project" from previously uploaded Coding instances
For SmartCoding instances that were already uploaded and you want to organize them to a group you can do by assigning a Project for each coding instance.
1. Click Edit SmartCoding instance
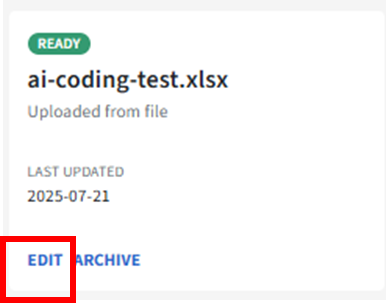
2. Once you are in the SmartCoding app, click More on the top, right side of the page and click Update Project
1. Click Edit SmartCoding instance
2. Once you are in the SmartCoding app, click More on the top, right side of the page and click Update Project
3. Type in or add the new Project name (i.e. Project Generation)
4. Once the Project name has been assigned to the coding instance, you may now use to filter the Project in the SmartCoding Directory page.
Note:
Uncategorized SmartCoding instance will have "(Uploaded from file)" in the project card when the SmartCoding is uploaded without the Project (field) specified.
When you have existing inca studies in the dashboard (Project Directory), and you've done SmartCoding to the open end questions on the dashboard, you can also view these SmartCoding instances in the SmartCoding Directory page. Instead of assigning a project, the project name (from the dashboard Project Directory) will be shown automatically to SmartCoding instance card.
Example of left showing just project name (from dashboard) and right where it is assigned to the project but is from an uploaded instance
Related Articles
How to export SmartCoding results to data files and how to read the results in the data files?
Any changes that you made to your coding project should be saved before exporting. To save any changes, click on Save in the upper right corner. You can view the result of the coding project on the SmartCoding platform (left side with Codes and Net ...How can I create a codeframe for SmartCoding?
Human-in-the-Loop Codeframe Generation The human-in-the-loop (HITL) SmartCoding allows human researchers to prompt the AI to help shape the code frame generation. The HITL coding functionalities are available both on the inca dashboard and in the ...How to Modify SmartCoding?
Users can modify the results of SmartCoding whether they are (1) using the SmartCoding app or (2) using the inca Dashboard 1. If you are using the SmartCoding App as a separate tool, it means you have manually uploaded you data (verbatims file) in ...How to upload data for SmartCoding?
To start a new coding project, go to the SmartCoding Directory and click+ New SmartCoding Note: If you need to recode an open end question from your dashboard project (Reports page), you only need to click RECODE in the open end question card and ...How can I add Filter variables to SmartCoding?
When uploading your data in SmartCoding, users can also add Filter variables. Filters are useful analysis tool that allows you to filter the responses from the total sample and show only the coded data for a certain group/segment or data set that you ...